Writing Your First Program
Now that Bascom is configured, let's try writing a simple program
that we'll call Blinky LED. I will assume you are a little
familiar with the basic language but I will explain each of the
lines in this program. The program will cause 1 pin to toggle
between +5v and 0v. An LED connected to this pin and through a
220ohm resistor to ground will blink on and off about 1 time per
second.
Other than the comment lines, there is only 6 statements in the
program.
| Config Porta = Output |
Tell the MCU that PortA (pins 32-40) will be
used for output. The possible values are 1 or 0 or can be
referred to as High and Low. High is +5v and Low is 0v
or ground. |
| Do |
This starts a Do-Loop. A Do-Loop will repeatedly
execute the code between the Do and Loop statements. |
| Toggle Porta.0 |
This changes the state of Port A, Pin 0
(Porta.0) from high to low or low to high |
| Waitms 500 |
This causes the MCU to pause for 1/2 of a second
or 500 ms. |
| Loop |
This end the Do-Loop. The progam execution
jumps back to the Do line and continues |
| End |
Last line of the program. This would end the
program execution but in this case, the Do-Loop prevents it
from executing |
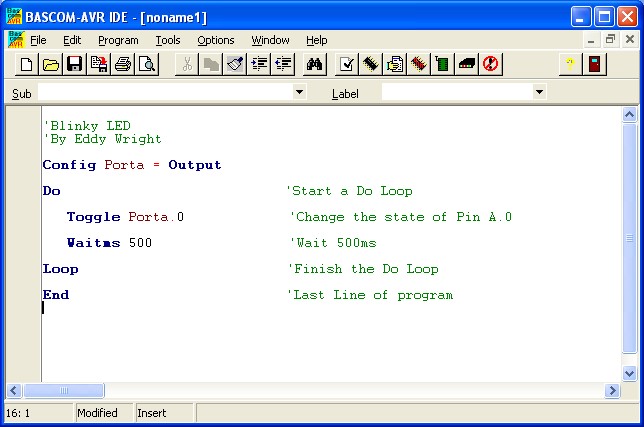 The program
should like like this once it is typed in the IDE. The program
should like like this once it is typed in the IDE.
Let's save the program by clicking on File/Save. If you are
prompted to "Leave the old config file?" click Yes.
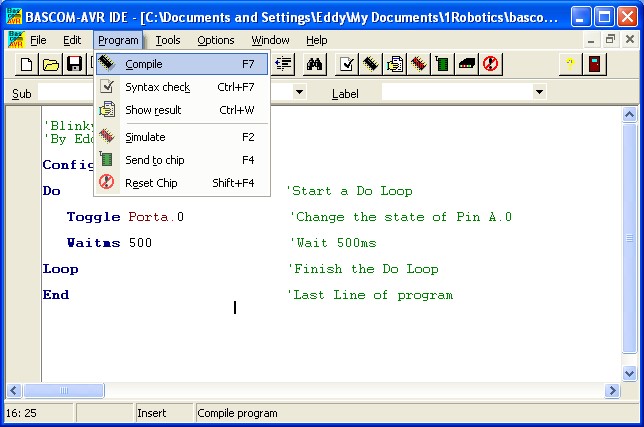 Now we can
compile the program into a format that the MCU can understand. Click
on Program/Compile and the compiler will check the program for
errors and if none are found, it will create the binary file ready
to load into the MCU. Any errors found will be listed at the bottom
of the IDE window. If this occurs, double check for spelling errors
in your program and refer back to step one to ensure that
m32def.dat is selected as the chip type in Options. Now we can
compile the program into a format that the MCU can understand. Click
on Program/Compile and the compiler will check the program for
errors and if none are found, it will create the binary file ready
to load into the MCU. Any errors found will be listed at the bottom
of the IDE window. If this occurs, double check for spelling errors
in your program and refer back to step one to ensure that
m32def.dat is selected as the chip type in Options.
Next -
Programming the M32
|
