Programming the M32
Once the program is compiled, it's ready to be
loaded into the memory of the DevBoard-M32. Bascom has a
built-in programmer that works with the DevBoard-ISP programming
cable.
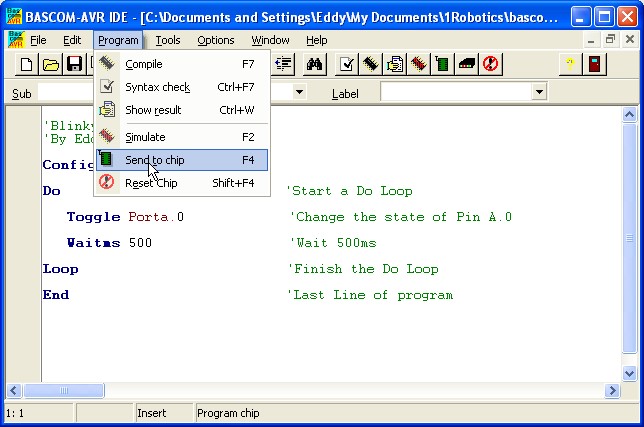 Click
on Program/Send to Chip to bring up the Programmer dialog box. Be
sure the DevBoard-M32 has power connected and the programming cable
is plugged into the IDC socket on the board and connected to the PC
parallel port. Click
on Program/Send to Chip to bring up the Programmer dialog box. Be
sure the DevBoard-M32 has power connected and the programming cable
is plugged into the IDC socket on the board and connected to the PC
parallel port.
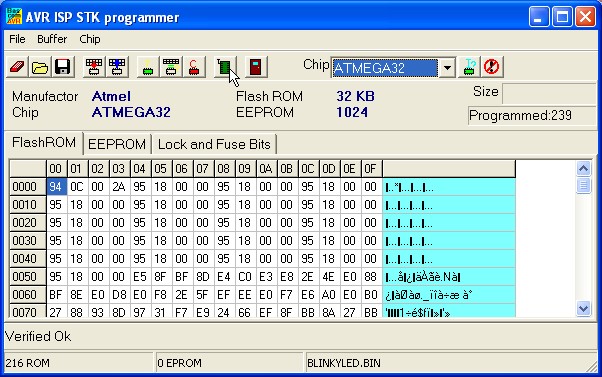 If
Bascom sees the programmer, this dialog box will appear. In the
programming dialog box, you can erase, program and verify the flash
memory, load up the EEProm memory and set the fusebits. We'll
cover fusebits a little later. If
Bascom sees the programmer, this dialog box will appear. In the
programming dialog box, you can erase, program and verify the flash
memory, load up the EEProm memory and set the fusebits. We'll
cover fusebits a little later.
To load your program into the
M32's chip, click the Auto-Program button on the toolbar as shown
above.
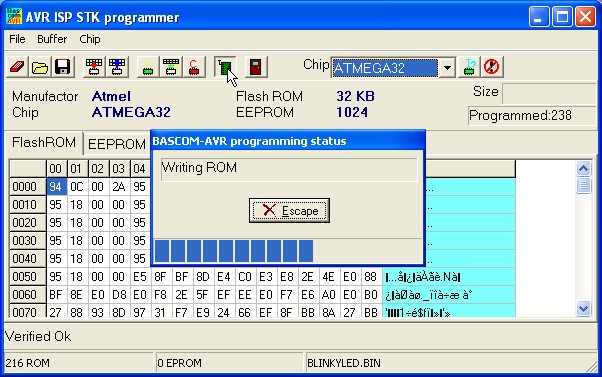 A dialog box will show the progress of the program being written to
memory and also show the progress of the automatic program
verification.
A dialog box will show the progress of the program being written to
memory and also show the progress of the automatic program
verification.
Once the programming is complete,
the M32 will begin execution of the program. In this case, there's
no problem with the programming starting right away, but if we were
to turn on motors, you may find your robot running away with the
programming cable still attached. Keep this in mind when
writing your program or by providing a method to disable motors
mechanically.
Now let's take a look at fusebits
- Changing Fusebits using Bascom
|
