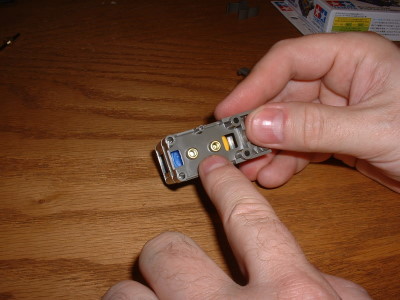
Place
2 of the brass eyelets into the holes of the middle piece of the housing
as shown in the picture..
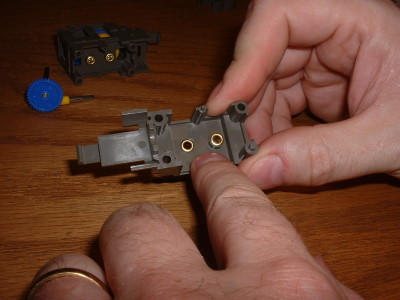
Locate
the right side housing part (should be the last part left) and the last 2
brass eyelets. Place the eyelets into the holes as shown in the
picture.
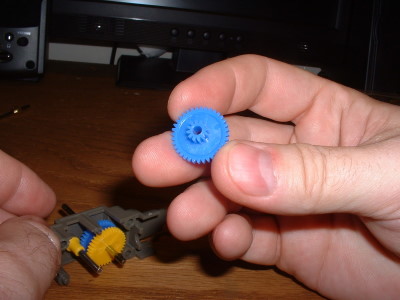
Locate one
of the blue G4 gears, using the picture as a guide.
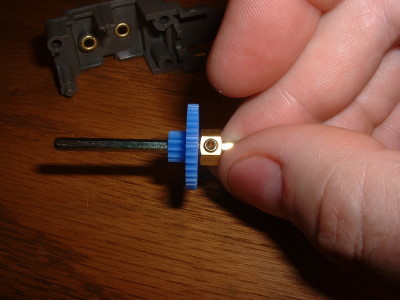
Hold
the short end of the hex shaft and slide the blue gear onto the long end
as shown in the picture. Be sure that the large gear is facing the gear
hub. The gear goes onto the long side of the shaft.
Slide
the hex shaft into the left hole as shown. Place the round steel
axle in the right hole as shown. The short side of the 2 axles should now
be about lined up with each other
Find
the yellow G4 gear, it has a hex shaped protrusion on one side that will
fit onto the gear hub on the hex axle.
Slip
the yellow gear onto the hex shaft as shown. Be sure to align the set
screw with the slot in the G4 gear. You should be able to clearly see the
set screw. If not, rotate the gear until set screw can be seen.
Select another
blue G3 gear.
Place
the blue G3 gear onto the round steel axle as shown in the picture. The
teeth of the smaller gear on the G4 should mesh with the teeth on the
larger gear on the yellow G4 gear.
Find
the yellow G2 gear. This gear has teeth on the face instead of the edge,
Place
the yellow G2 gear onto the hex shaft as shown in the picture. The small
gear on the G2 should mesh with the larger gear on the G3.
Find
the small aluminum spacer - refer to the picture.
Slide
the spacer onto the round steel axle as shown in the picture. The space
slides up against the blue gear.
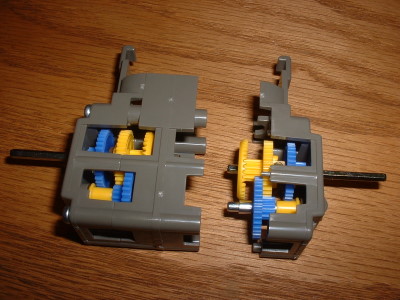
Now
we can slide the 2 housing parts together. Make sure the 2 axle holes in
the middle housing section have the brass eyelets in place so the axles
will fit into the brass eyelets and not into the plastic.
Place
the 3 screws into the holes on the outside housing as shown in the picture.
There are actually 4 holes but only 3 will accept the screws. The fourth
hole is under my thumb in the picture.

 Place
2 of the brass eyelets into the holes of the middle piece of the housing
as shown in the picture..
Place
2 of the brass eyelets into the holes of the middle piece of the housing
as shown in the picture..
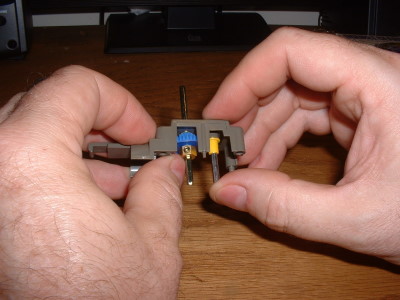
 Locate
the right side housing part (should be the last part left) and the last 2
brass eyelets. Place the eyelets into the holes as shown in the
picture.
Locate
the right side housing part (should be the last part left) and the last 2
brass eyelets. Place the eyelets into the holes as shown in the
picture.
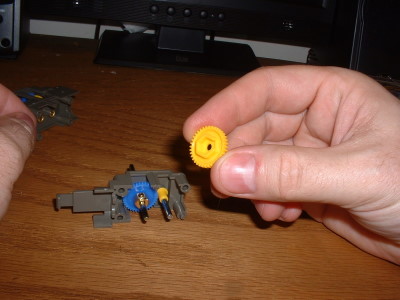
 Locate one
of the blue G4 gears, using the picture as a guide.
Locate one
of the blue G4 gears, using the picture as a guide.
 Hold
the short end of the hex shaft and slide the blue gear onto the long end
as shown in the picture. Be sure that the large gear is facing the gear
hub. The gear goes onto the long side of the shaft.
Hold
the short end of the hex shaft and slide the blue gear onto the long end
as shown in the picture. Be sure that the large gear is facing the gear
hub. The gear goes onto the long side of the shaft.
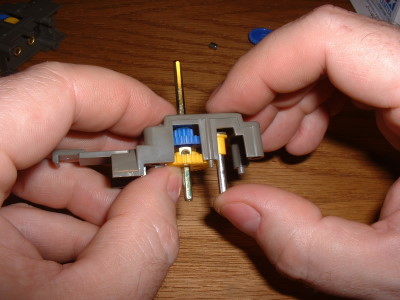
 Slide
the hex shaft into the left hole as shown. Place the round steel
axle in the right hole as shown. The short side of the 2 axles should now
be about lined up with each other
Slide
the hex shaft into the left hole as shown. Place the round steel
axle in the right hole as shown. The short side of the 2 axles should now
be about lined up with each other
 Find
the yellow G4 gear, it has a hex shaped protrusion on one side that will
fit onto the gear hub on the hex axle.
Find
the yellow G4 gear, it has a hex shaped protrusion on one side that will
fit onto the gear hub on the hex axle.
 Slip
the yellow gear onto the hex shaft as shown. Be sure to align the set
screw with the slot in the G4 gear. You should be able to clearly see the
set screw. If not, rotate the gear until set screw can be seen.
Slip
the yellow gear onto the hex shaft as shown. Be sure to align the set
screw with the slot in the G4 gear. You should be able to clearly see the
set screw. If not, rotate the gear until set screw can be seen.
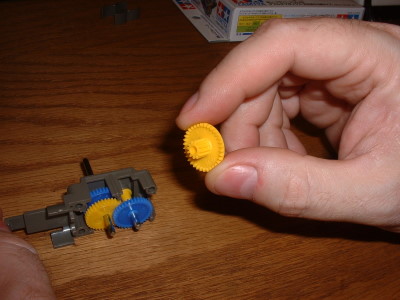
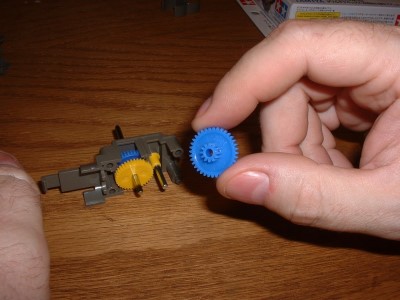 Select another
blue G3 gear.
Select another
blue G3 gear.
 Place
the blue G3 gear onto the round steel axle as shown in the picture. The
teeth of the smaller gear on the G4 should mesh with the teeth on the
larger gear on the yellow G4 gear.
Place
the blue G3 gear onto the round steel axle as shown in the picture. The
teeth of the smaller gear on the G4 should mesh with the teeth on the
larger gear on the yellow G4 gear.
 Find
the yellow G2 gear. This gear has teeth on the face instead of the edge,
Find
the yellow G2 gear. This gear has teeth on the face instead of the edge,
 Place
the yellow G2 gear onto the hex shaft as shown in the picture. The small
gear on the G2 should mesh with the larger gear on the G3.
Place
the yellow G2 gear onto the hex shaft as shown in the picture. The small
gear on the G2 should mesh with the larger gear on the G3.
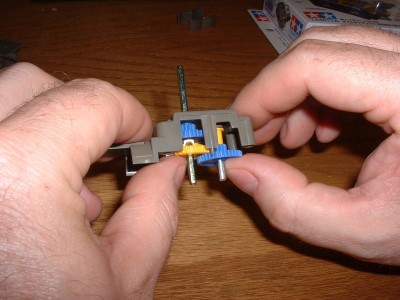
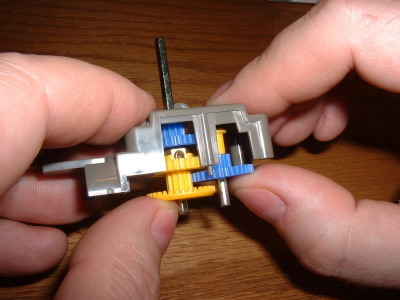
 Now
we can slide the 2 housing parts together. Make sure the 2 axle holes in
the middle housing section have the brass eyelets in place so the axles
will fit into the brass eyelets and not into the plastic.
Now
we can slide the 2 housing parts together. Make sure the 2 axle holes in
the middle housing section have the brass eyelets in place so the axles
will fit into the brass eyelets and not into the plastic.
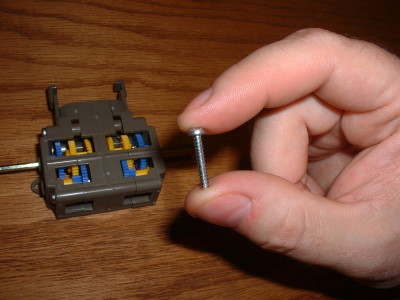 Find
3 of the 18mm coarse threaded screws like the one shown in the picture.
Find
3 of the 18mm coarse threaded screws like the one shown in the picture.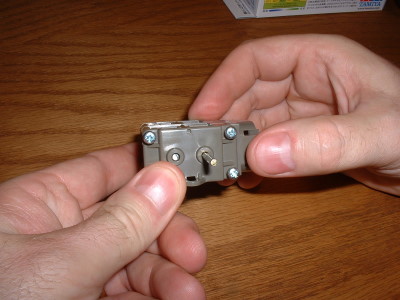 Place
the 3 screws into the holes on the outside housing as shown in the picture.
There are actually 4 holes but only 3 will accept the screws. The fourth
hole is under my thumb in the picture.
Place
the 3 screws into the holes on the outside housing as shown in the picture.
There are actually 4 holes but only 3 will accept the screws. The fourth
hole is under my thumb in the picture.