There are 4 axles used in the
gearbox, 2 for each half of the Double Gearbox. Each axle needs a
bushing placed on it. We will do all 4 axles together.
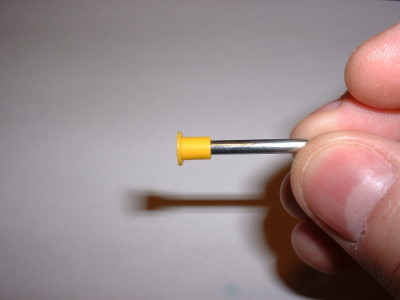
Start
with the small steel axle and place the long yellow bushing on the end as
shown in the picture.
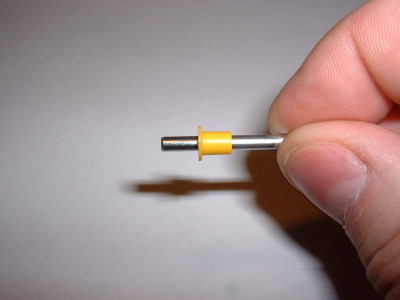
Next,
slide the bushing on until about 7mm of axle is protruding beyond the
bushing (don't worry about getting it exact, we'll measure it in the next
step).
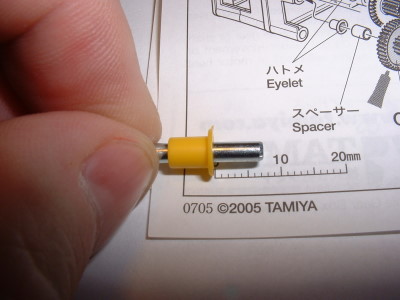
Use
the metric ruler at the bottom of the instruction page to measure the axle
to ensure that 7mm is protruding.
Repeat this process with the second short axle.
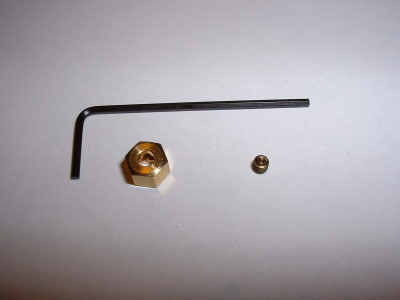
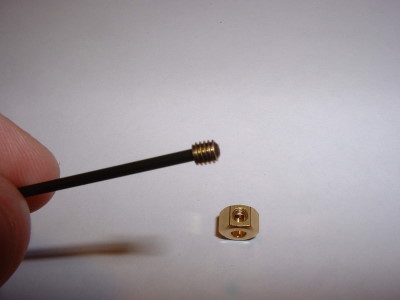
Locate
the gearhub, set screw and hex wrench. The gear hub is held in place
by the small set screw (called a grub screw in the instructions).
The
set screw is very small. to make it easier to install the set screw into the
gear hub, place it on the end of the hex wrench as shown in the picture.
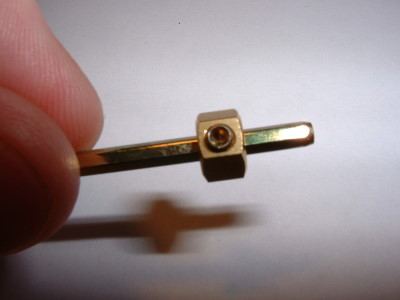
now
thread the set screw into the hub 1-2 turns. If you thread it in too far,
the hub won't slide onto the hex shaft.
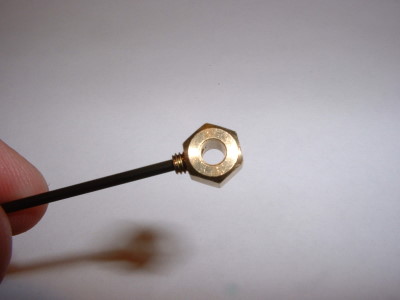
Now
slide the gear hub onto the hex shaft. If the hub won't slide on, back out
the set screw until it does. Snug the screw slightly but don't tighten it
yet.
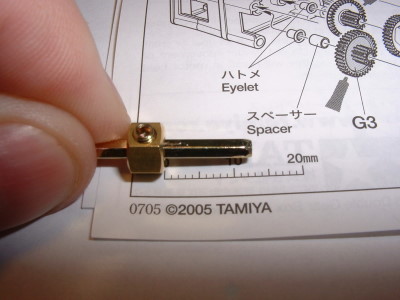
Use
the metric ruler on the instructions sheet to measure the amount of axle
protruding from the gear hub. Slide the hex axle until 13mm is showing.
Tighten the set screw firmly.
Repeat
the process for the other 2 axles and set them aside. We will use in the
next couple of steps.

 Start
with the small steel axle and place the long yellow bushing on the end as
shown in the picture.
Start
with the small steel axle and place the long yellow bushing on the end as
shown in the picture.
 Next,
slide the bushing on until about 7mm of axle is protruding beyond the
bushing (don't worry about getting it exact, we'll measure it in the next
step).
Next,
slide the bushing on until about 7mm of axle is protruding beyond the
bushing (don't worry about getting it exact, we'll measure it in the next
step).
 Use
the metric ruler at the bottom of the instruction page to measure the axle
to ensure that 7mm is protruding.
Use
the metric ruler at the bottom of the instruction page to measure the axle
to ensure that 7mm is protruding.
 Locate
the gearhub, set screw and hex wrench. The gear hub is held in place
by the small set screw (called a grub screw in the instructions).
Locate
the gearhub, set screw and hex wrench. The gear hub is held in place
by the small set screw (called a grub screw in the instructions).
 The
set screw is very small. to make it easier to install the set screw into the
gear hub, place it on the end of the hex wrench as shown in the picture.
The
set screw is very small. to make it easier to install the set screw into the
gear hub, place it on the end of the hex wrench as shown in the picture.
 now
thread the set screw into the hub 1-2 turns. If you thread it in too far,
the hub won't slide onto the hex shaft.
now
thread the set screw into the hub 1-2 turns. If you thread it in too far,
the hub won't slide onto the hex shaft.
 Now
slide the gear hub onto the hex shaft. If the hub won't slide on, back out
the set screw until it does. Snug the screw slightly but don't tighten it
yet.
Now
slide the gear hub onto the hex shaft. If the hub won't slide on, back out
the set screw until it does. Snug the screw slightly but don't tighten it
yet.
 Use
the metric ruler on the instructions sheet to measure the amount of axle
protruding from the gear hub. Slide the hex axle until 13mm is showing.
Tighten the set screw firmly.
Use
the metric ruler on the instructions sheet to measure the amount of axle
protruding from the gear hub. Slide the hex axle until 13mm is showing.
Tighten the set screw firmly.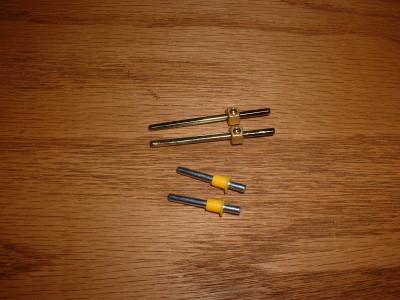 Repeat
the process for the other 2 axles and set them aside. We will use in the
next couple of steps.
Repeat
the process for the other 2 axles and set them aside. We will use in the
next couple of steps.